DIY Interchangeable Fabric Frame
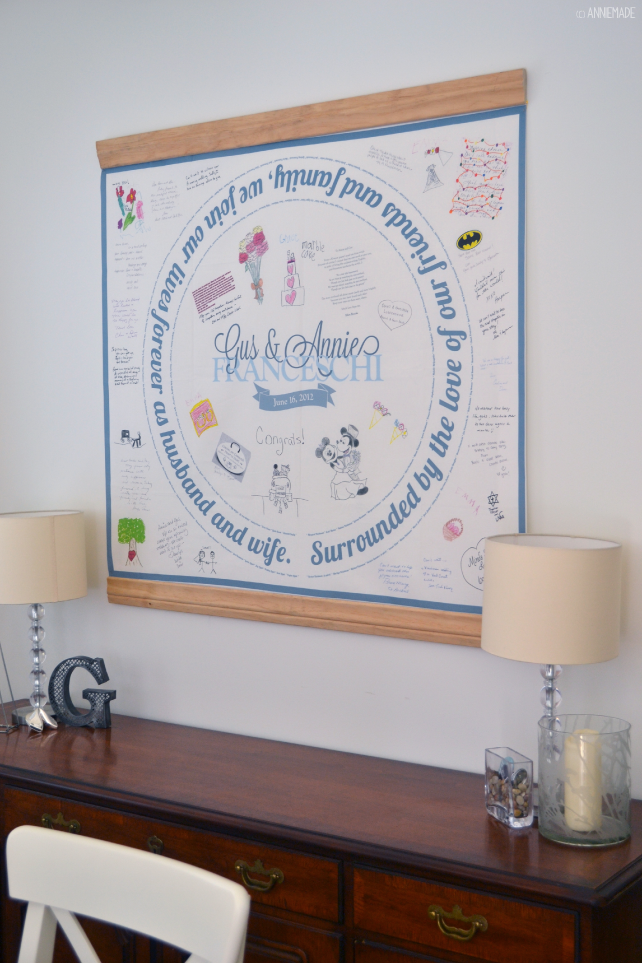
This Tuesday, I showed you our Chuppah (Wedding Canopy) and today I am delighted to show you that we finally made a home for it - right above the buffet in our combined living and dining room. We did this by creating an interchangeable frame - perfect to display this keepsake as well as convenient to switch out for parties with other backdrops!
This quick and easy fabric project was inspired by this 5 Minute Balsa Wood Art Print Frame created by Rachael Smith of Penelope & Pip.

I had been searching for the ideal way to frame our Chuppah since, as a yard of fabric, it's inconveniently sized for conventional frames from Michael's at 42 x 36". It's just big enough to need a custom frame that goes for $100's of dollars.
So sometimes, frustration and affordability is the mother of invention. With inspiration from Rachel's lightweight, balsa wood interchangeable frame, we decided to do the same - just on a much bigger scale.
Here's how you can create your own for just around $25 total...
Supplies
- Your desired fabric
- 7' piece of wood moulding, the lighter the better, cut in half (adjust for the length of your fabric if it's more or less than a yard / the people at Lowe's cut ours for us)
- 3 sets of picture hanging hardware (the kind pictured below)
- 2 sets of 18" sticky velcro (both sides)
- Sandpaper
- 3 nails
- Hammer
- Scissors
- Level and ruler

Instructions
Sand out any rough edges on your moulding using your sandpaper and do any decorating to the moulding you'd like. We liked the natural wood look but you could easily customize this with a wood stain or paint.
Next, take one of the pieces of moulding and treat it as the "top" of your frame. This is the only side you will adhere hardware to. Turn the side over that will face the wall and hammer in your three picture hangers as pictured above. Place one in the middle and the other two the exact amount of distance away on either side (we recommend 18").
Once you've done this, it's time for the velcro. Using the first set of velcro, split both sides of into 3 identically sized pieces. Flip your moulding over and set up on top of your fabric so that when you flip it back, it will be covering the top as a frame would. From this angle, stick the first piece of velcro on the bottom lip of your moulding. Take its matching side of velcro and attach it to where you want it to meet the fabric. Repeat for the middle of the moulding bar and the remaining side.
To finish the frame, add the 2nd set of velcro to the bottom of your fabric and the second piece of moulding using the same process. By using lightweight moulding, the fabric actually holds the 2nd piece of moulding in place in the frame.
Make sure everything is firmly attached and then hang on your wall using 3 nails and your previously installed picture hangers. Then kickback and enjoy something special!
Hope you enjoyed this quick little project. I'm throwing a party in a few weeks and can't wait to show you how fun and easy it is to re-use this frame with a different backdrop. Pretty fun to have such easily interchangeable art!
